cat donut
a two-piece exploration into the plastic-injected imagination
it all started with
brianna
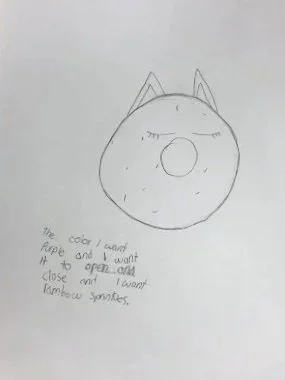
Inspired by the imagination of a local 4th grader, Cat Donut was introduced to the world in the drawing to the right.
My team and I set out to create Cat Donut as a two-piece plastic toy using injection molding.
As written, “the color I want purple and I want it to open and close and I want (sic) rambow sprinkles.”
With a clear direction to start, our team set out to define the shape and design of the Cat Donut to satisfy Brianna’s requirements and ensure optimal injection molding techniques.
defining the shape
-
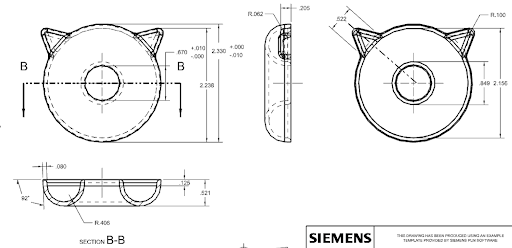
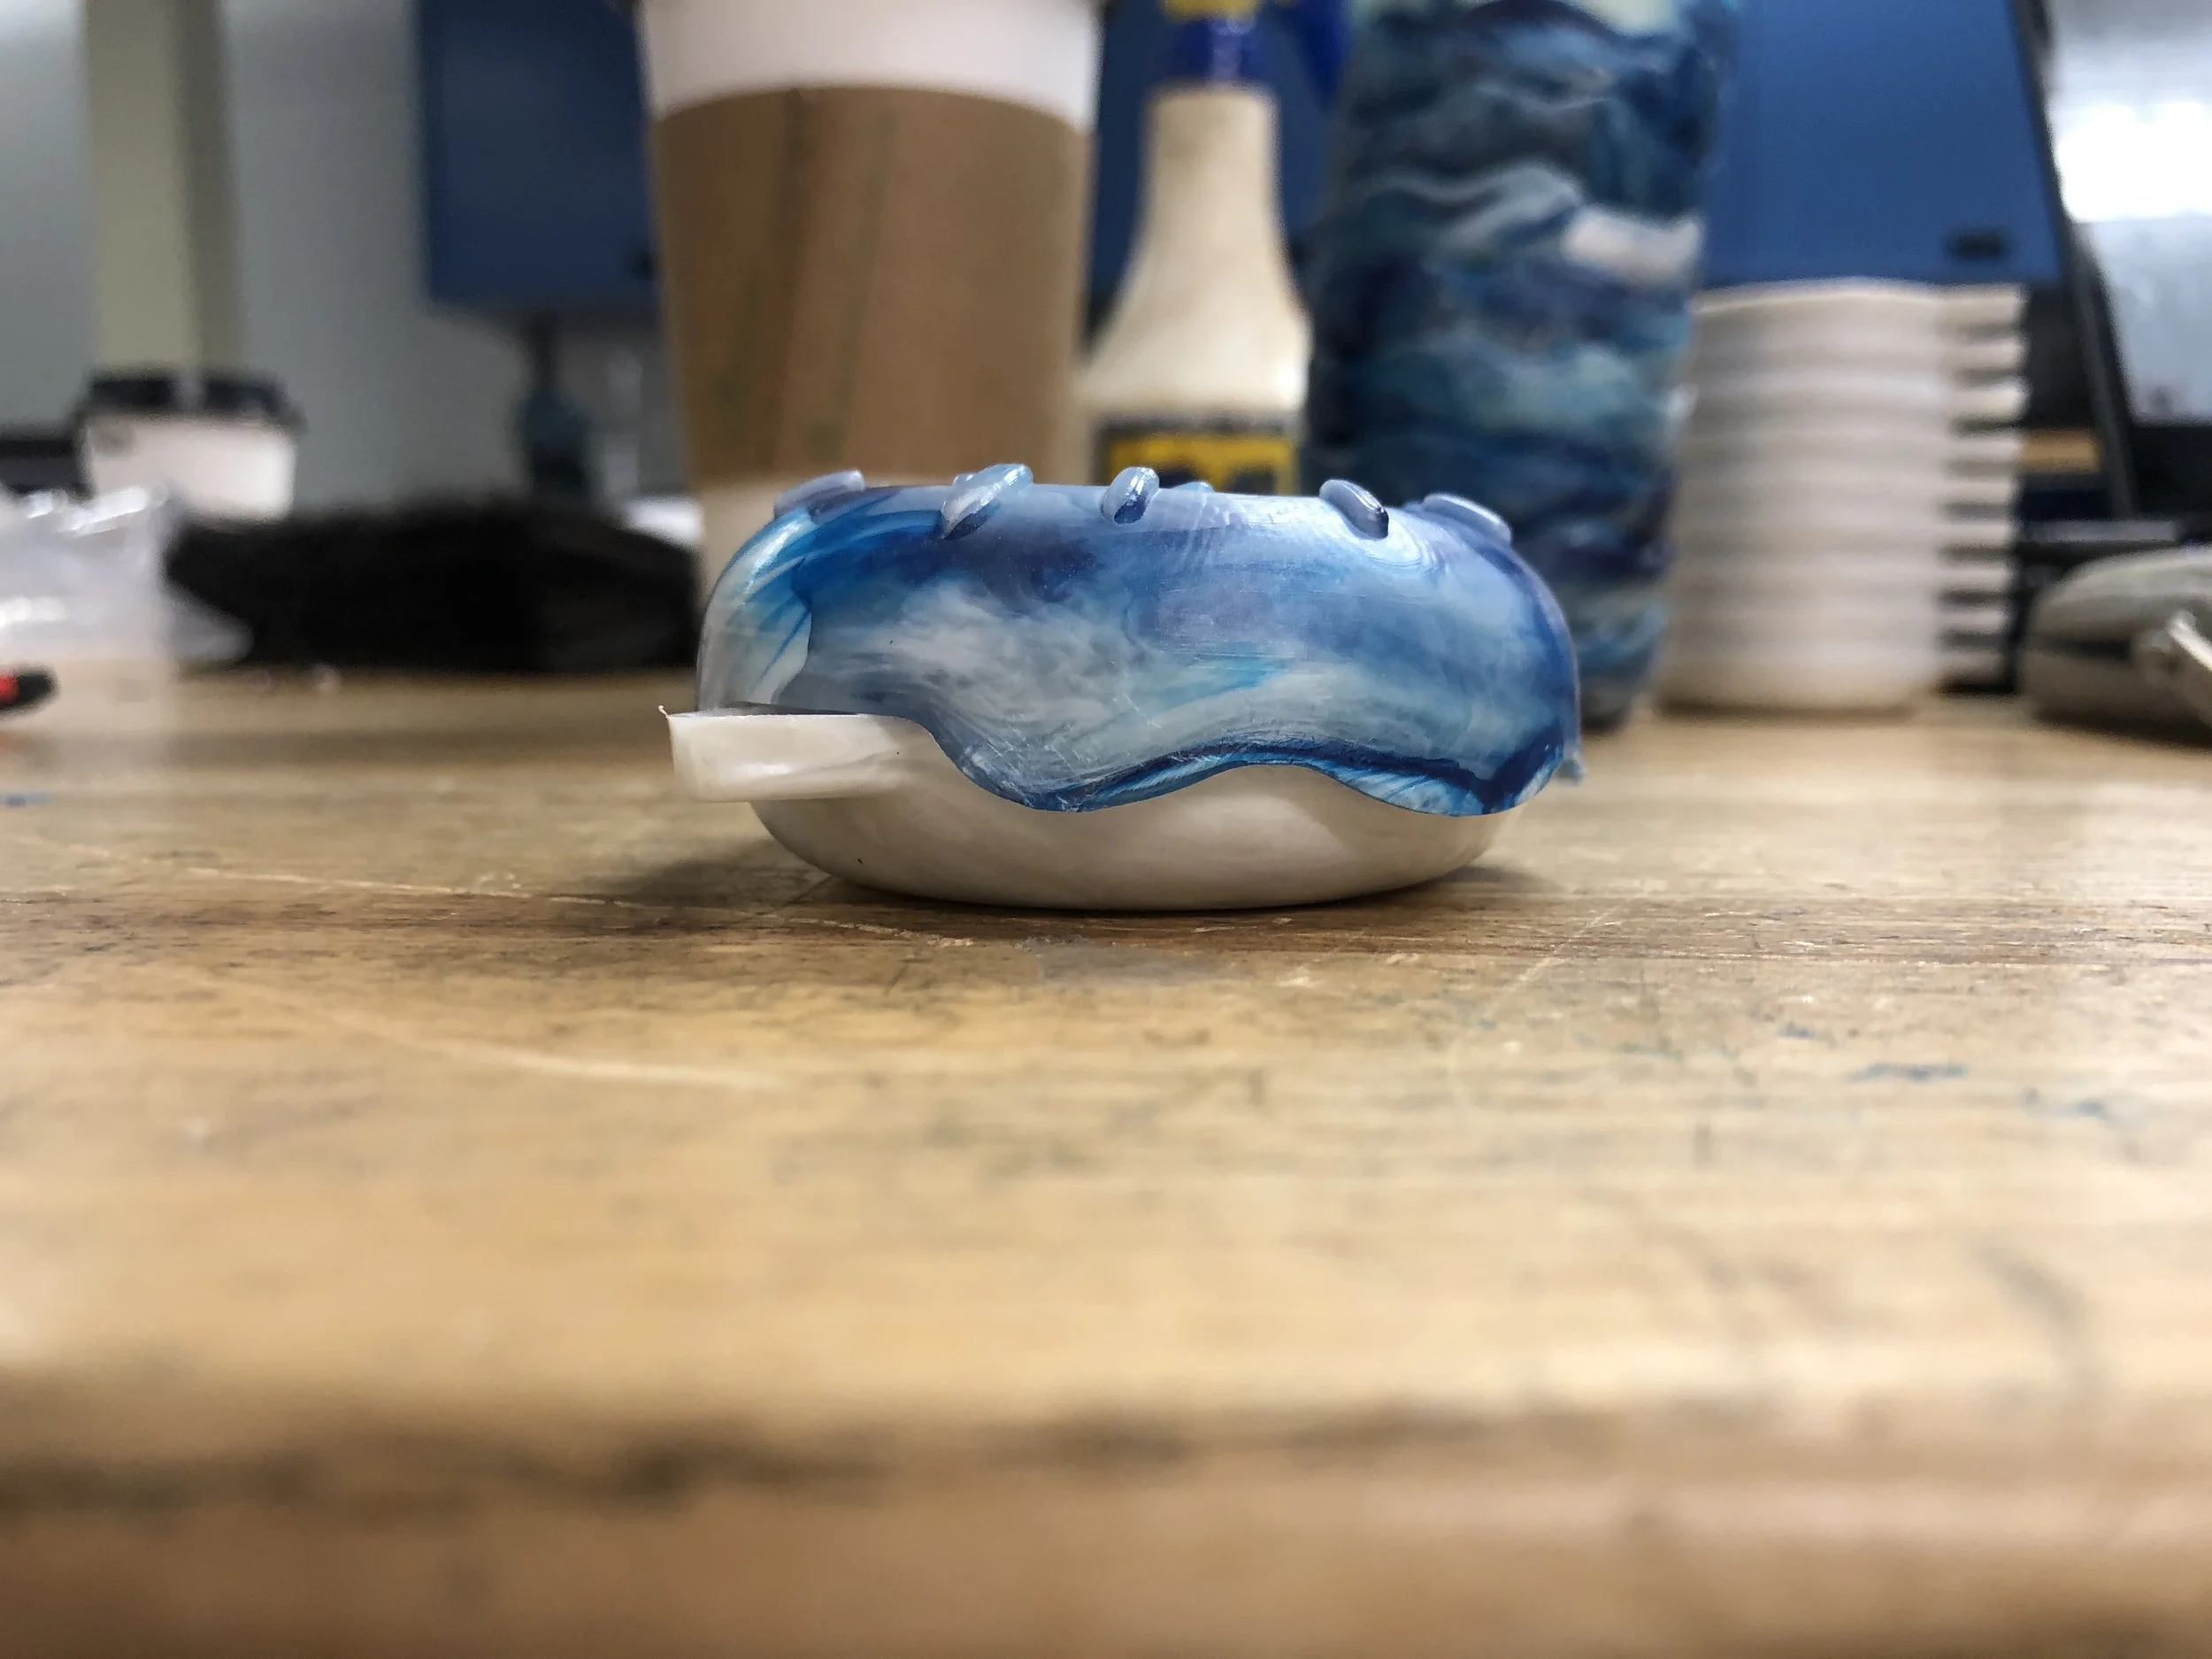
Arguably the easiest feature to identify is the donut shape. A simple torus, the donut could easily be split in half to empower the open/close feature as requested by Brianna, as well as seriously mitigate the amount of plastic used. Splitting the donut into two half-tori allowed us to create thin-walled pieces, ideal for injection molding.
-
It can’t be the Cat Donut without its iconic cat ears. To create the ears, the bottom half gained thin triangles on the edge. The top half included cut-outs to allow the ears to nest cleanly. In an effort to keep a uniform wall thickness and prevent heat sink, the interior wall that would be the base of the triangle was removed.
-
A key requirement from our designer-in-chief was rainbow sprinkles. Adding pill-shaped sprinkles along the top half was no problem. For the raised sprinkle, the height was minimized to ensure minimal heat sink. However, it is unfortunately not possible to create a rainbow surface feature with current injection molding technologies.
-
As demure as ever, the Cat Donut features closed eyes. Its restful demeanor manifested as curved raised edges on the top half. Similar height considerations were made for the eyes as were made for the sprinkles.
-
A late addition to Cat Donut, the side edge of the top half used a wave-like curved edge to mimic the drip of frosting. This feature also effectively hid any gaps between the two halves of the donut when the bottom was nested into the top.
from page to plastic
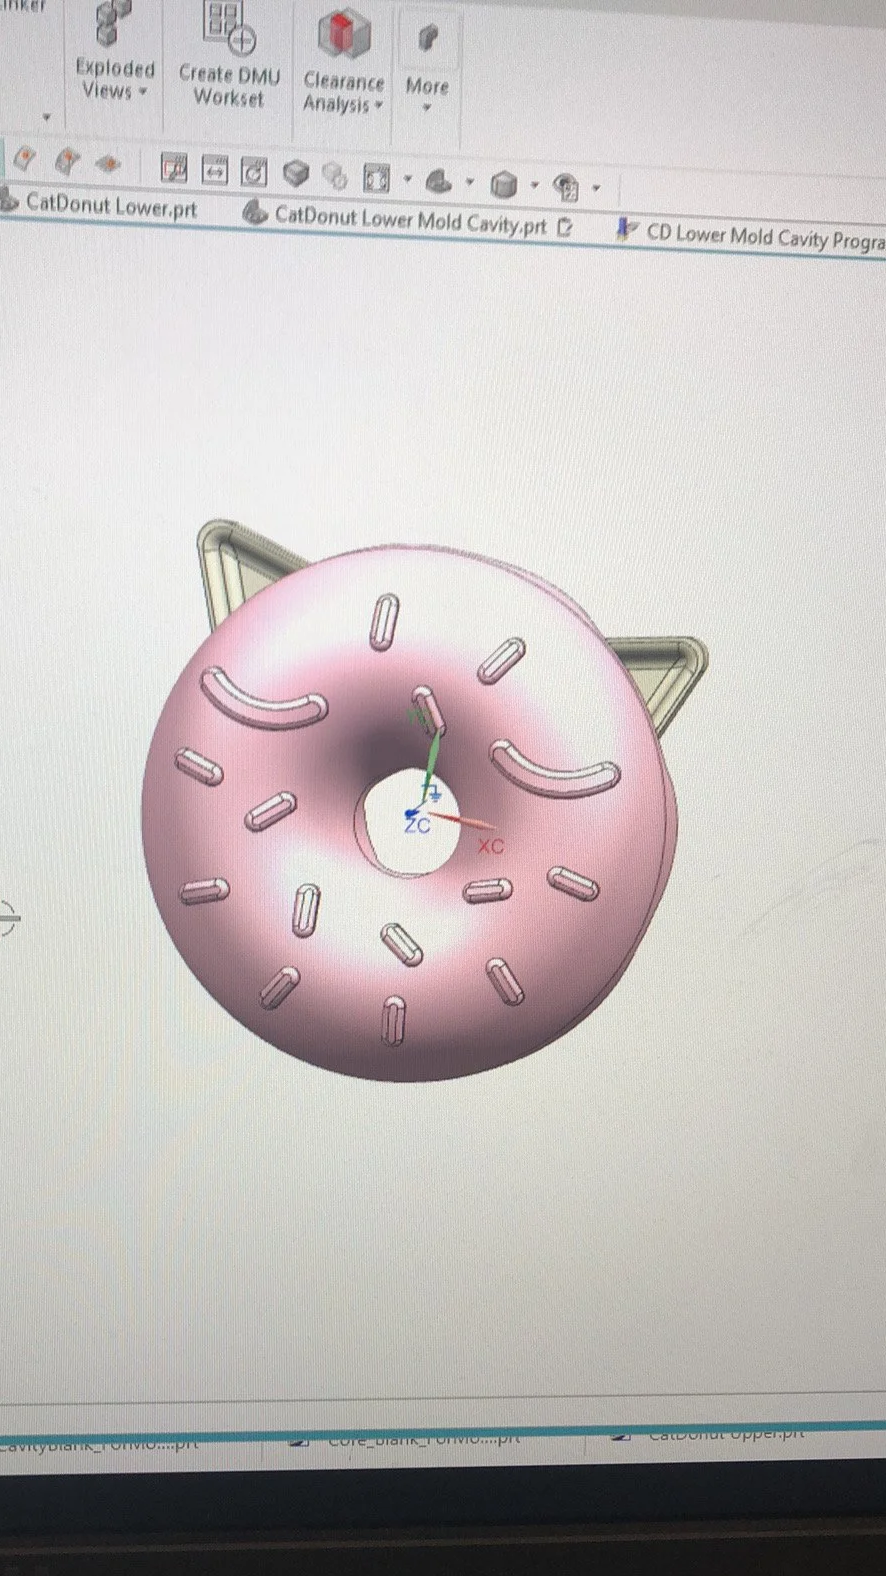
model cat donut in nx
1
Step 1 was to bring Cat Donut from 2D to 3D, defining the shape and design of the parts in the process. We created two models, one for the top and one for the bottom.
model & program molds
2
To create the molds, we used a negative of the Cat Donut to create a core and cavity for each part. Programming in CAM allowed us to finally bring Cat Donut into the physical world.
cnc mill molds from blanks
3
With the programs ready and the fixture set, the aluminum blocks were ready to be machined to form. Though zeroing the system and selecting the correct tools proved more difficult than anticipated, the final molds came out great.
inject liquid plastic into molds
4
Armed with physical molds, we chose the clamping force, shot size, and materials to create a final product. With this step complete, Cat Donut was officially born.
final designs
cat donut top
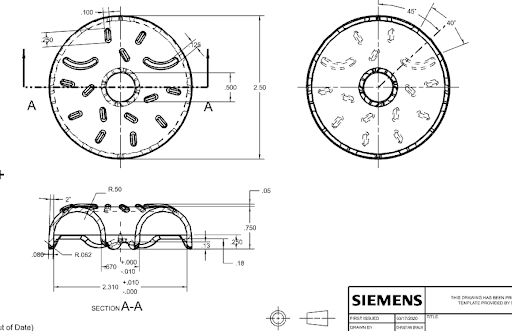
The top half of the Cat Donut features:
2° draft for easy removal of parts from mold
minimized height for eyes and sprinkles to prevent heat sinks
gate placed to ensure heat sinks would occur on part interior (not visible)
cut-outs for ears to nest easily
interference nubs to ensure proper holding between top and bottom halves
anti-rotation nub on lip
cat donut bottom
The bottom half of the Cat Donut features:
2° draft for easy removal of parts from mold
uniform wall thickness of .08”
removed ear edges to maintain even wall thickness
final parts
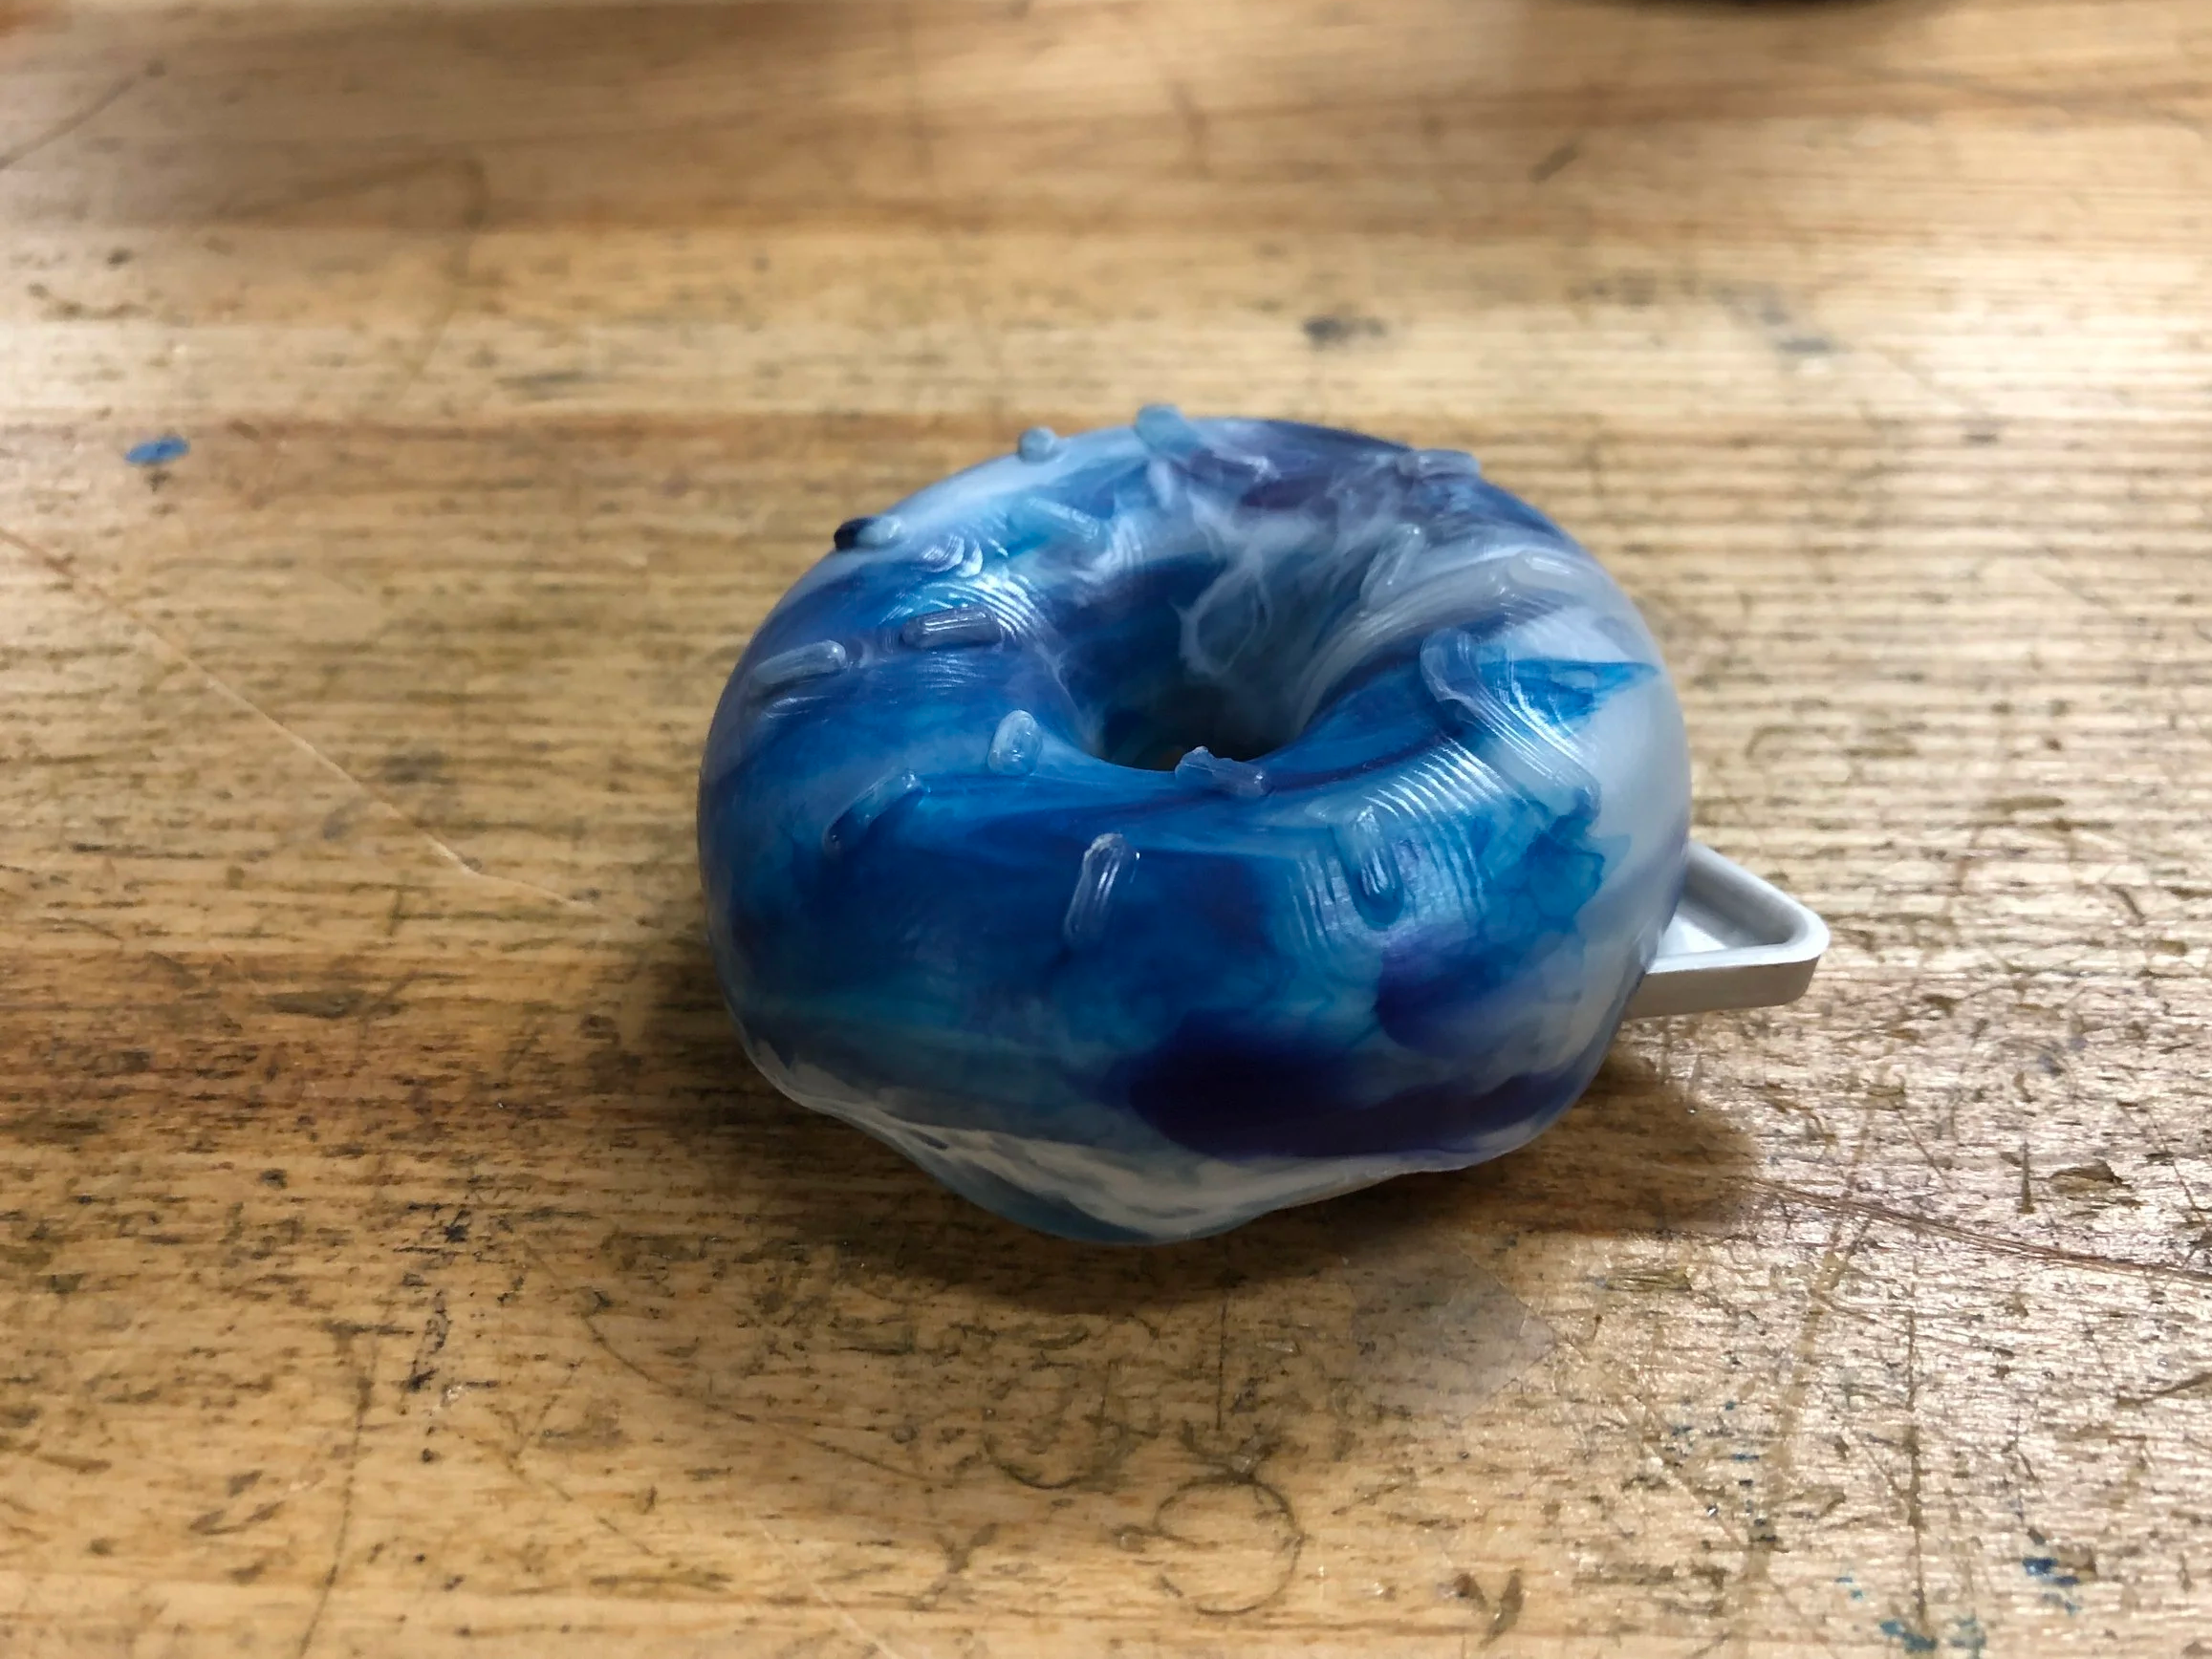
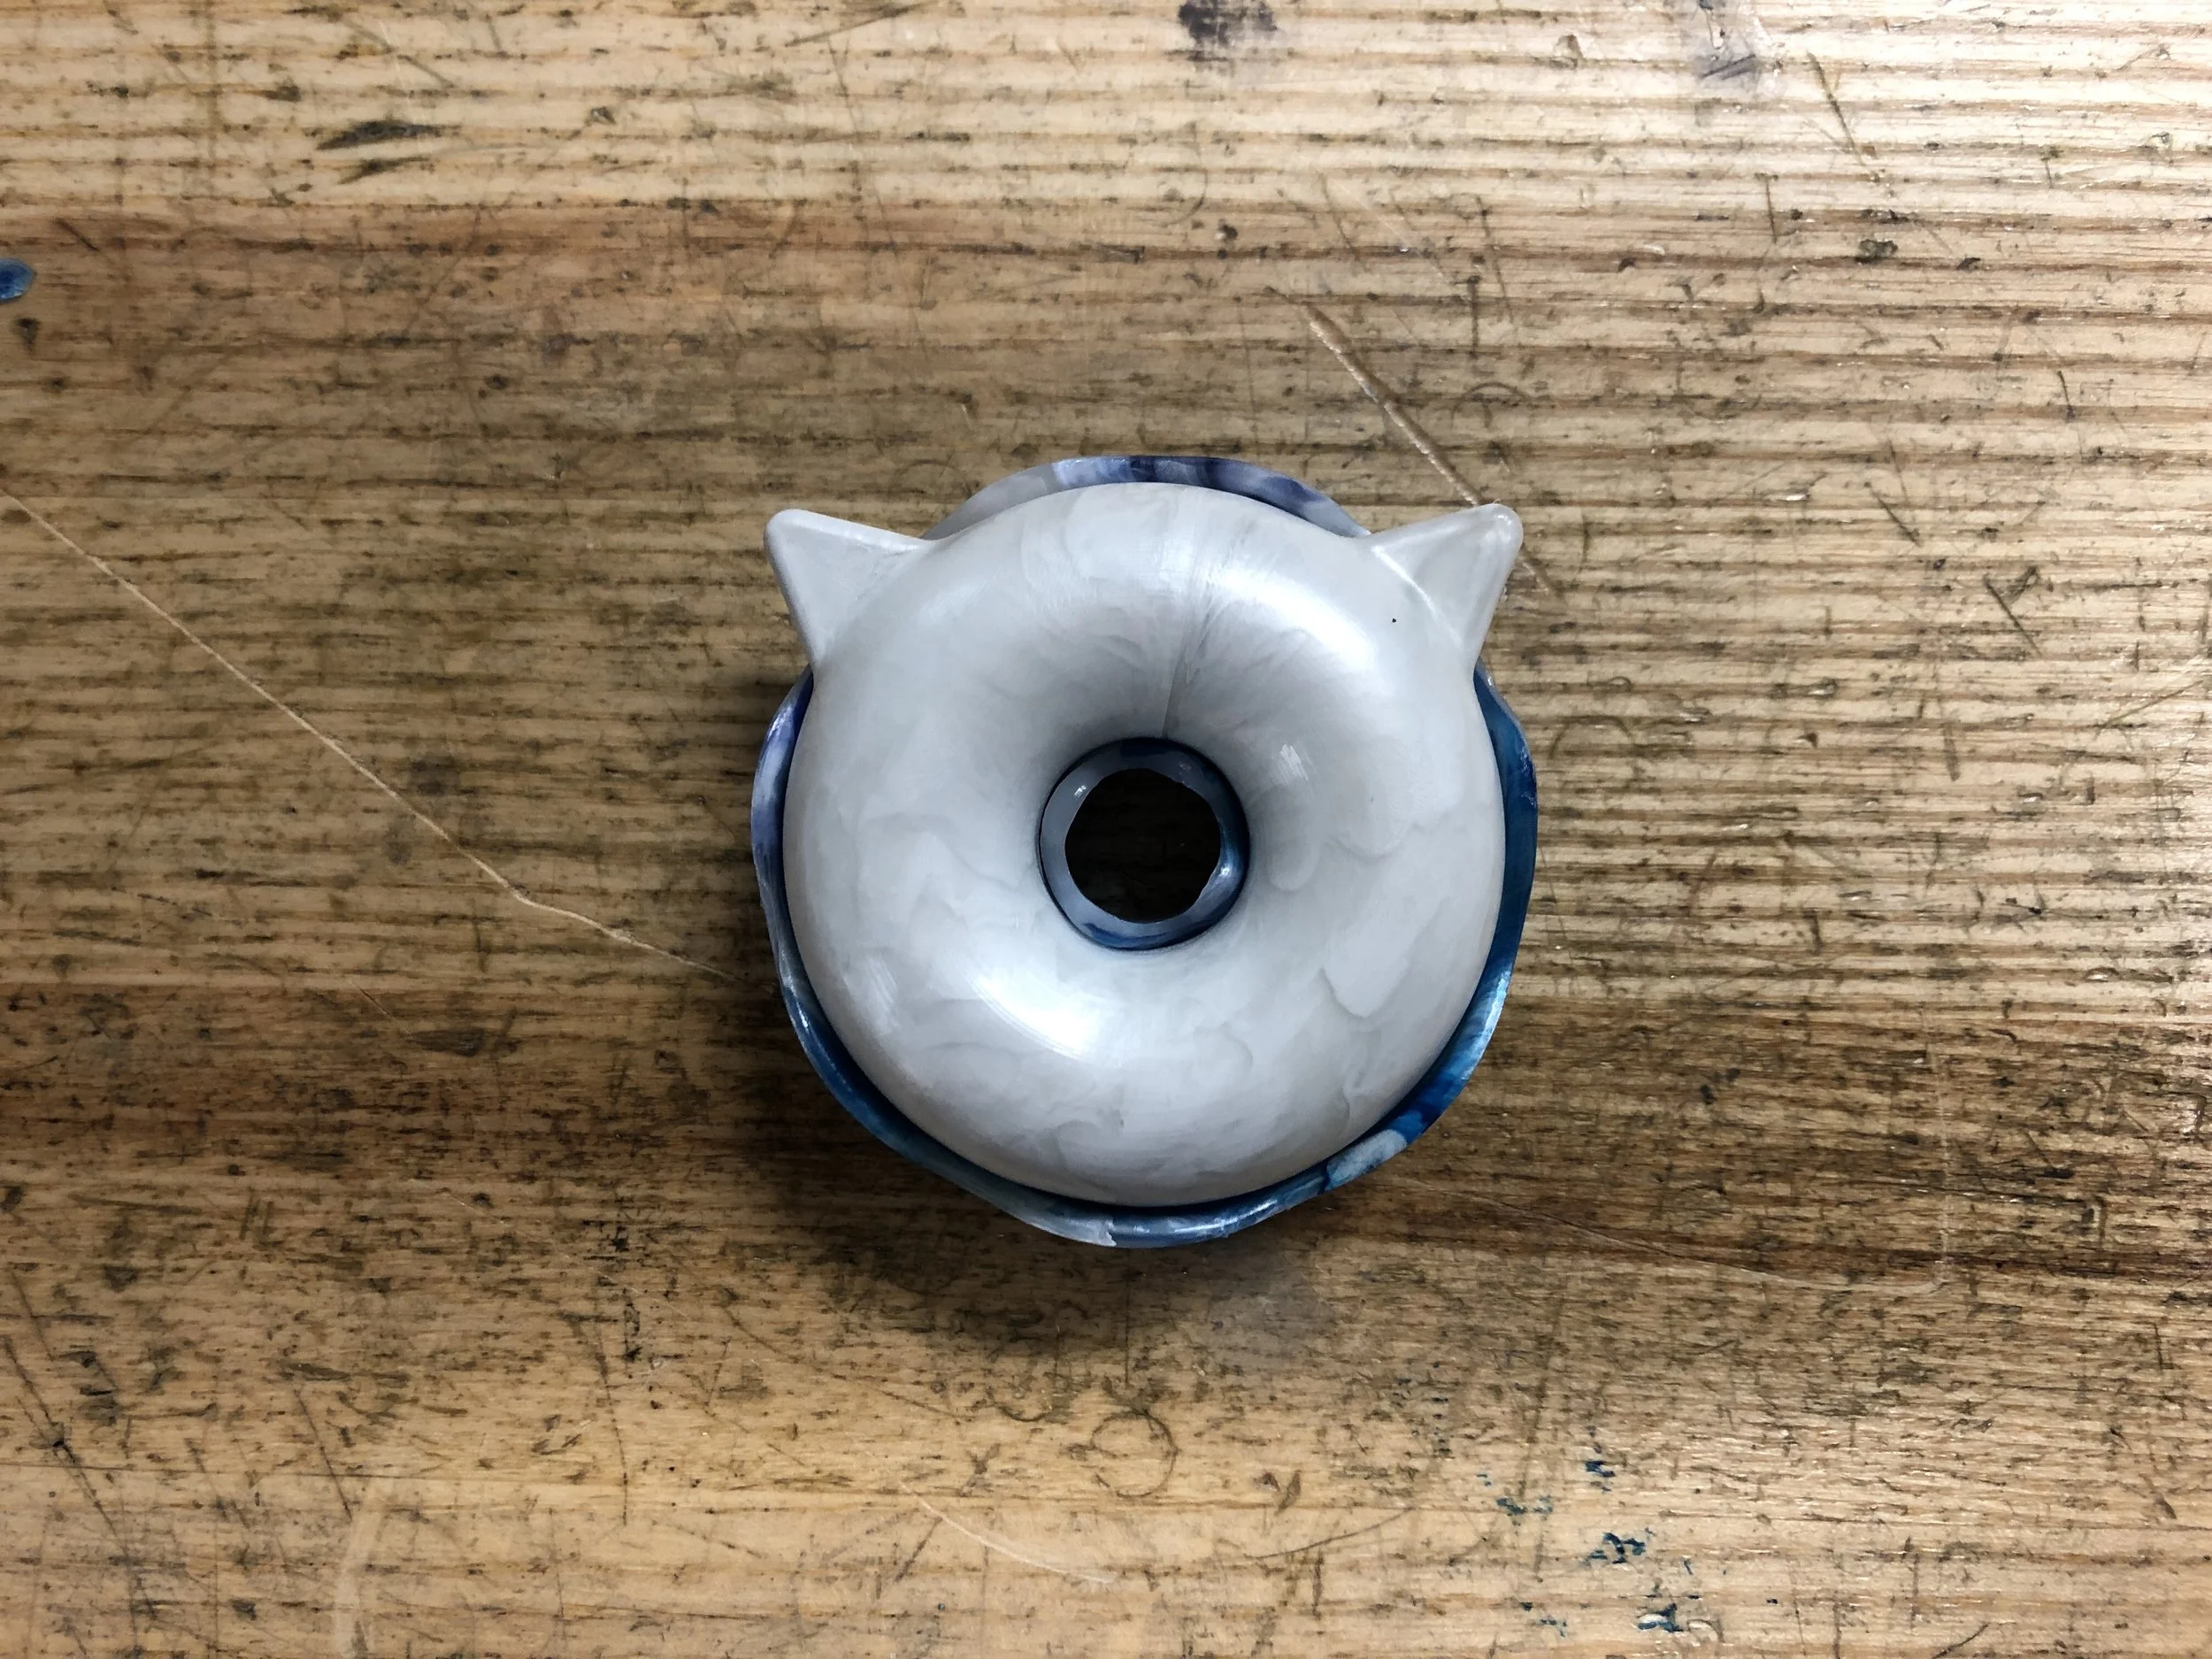
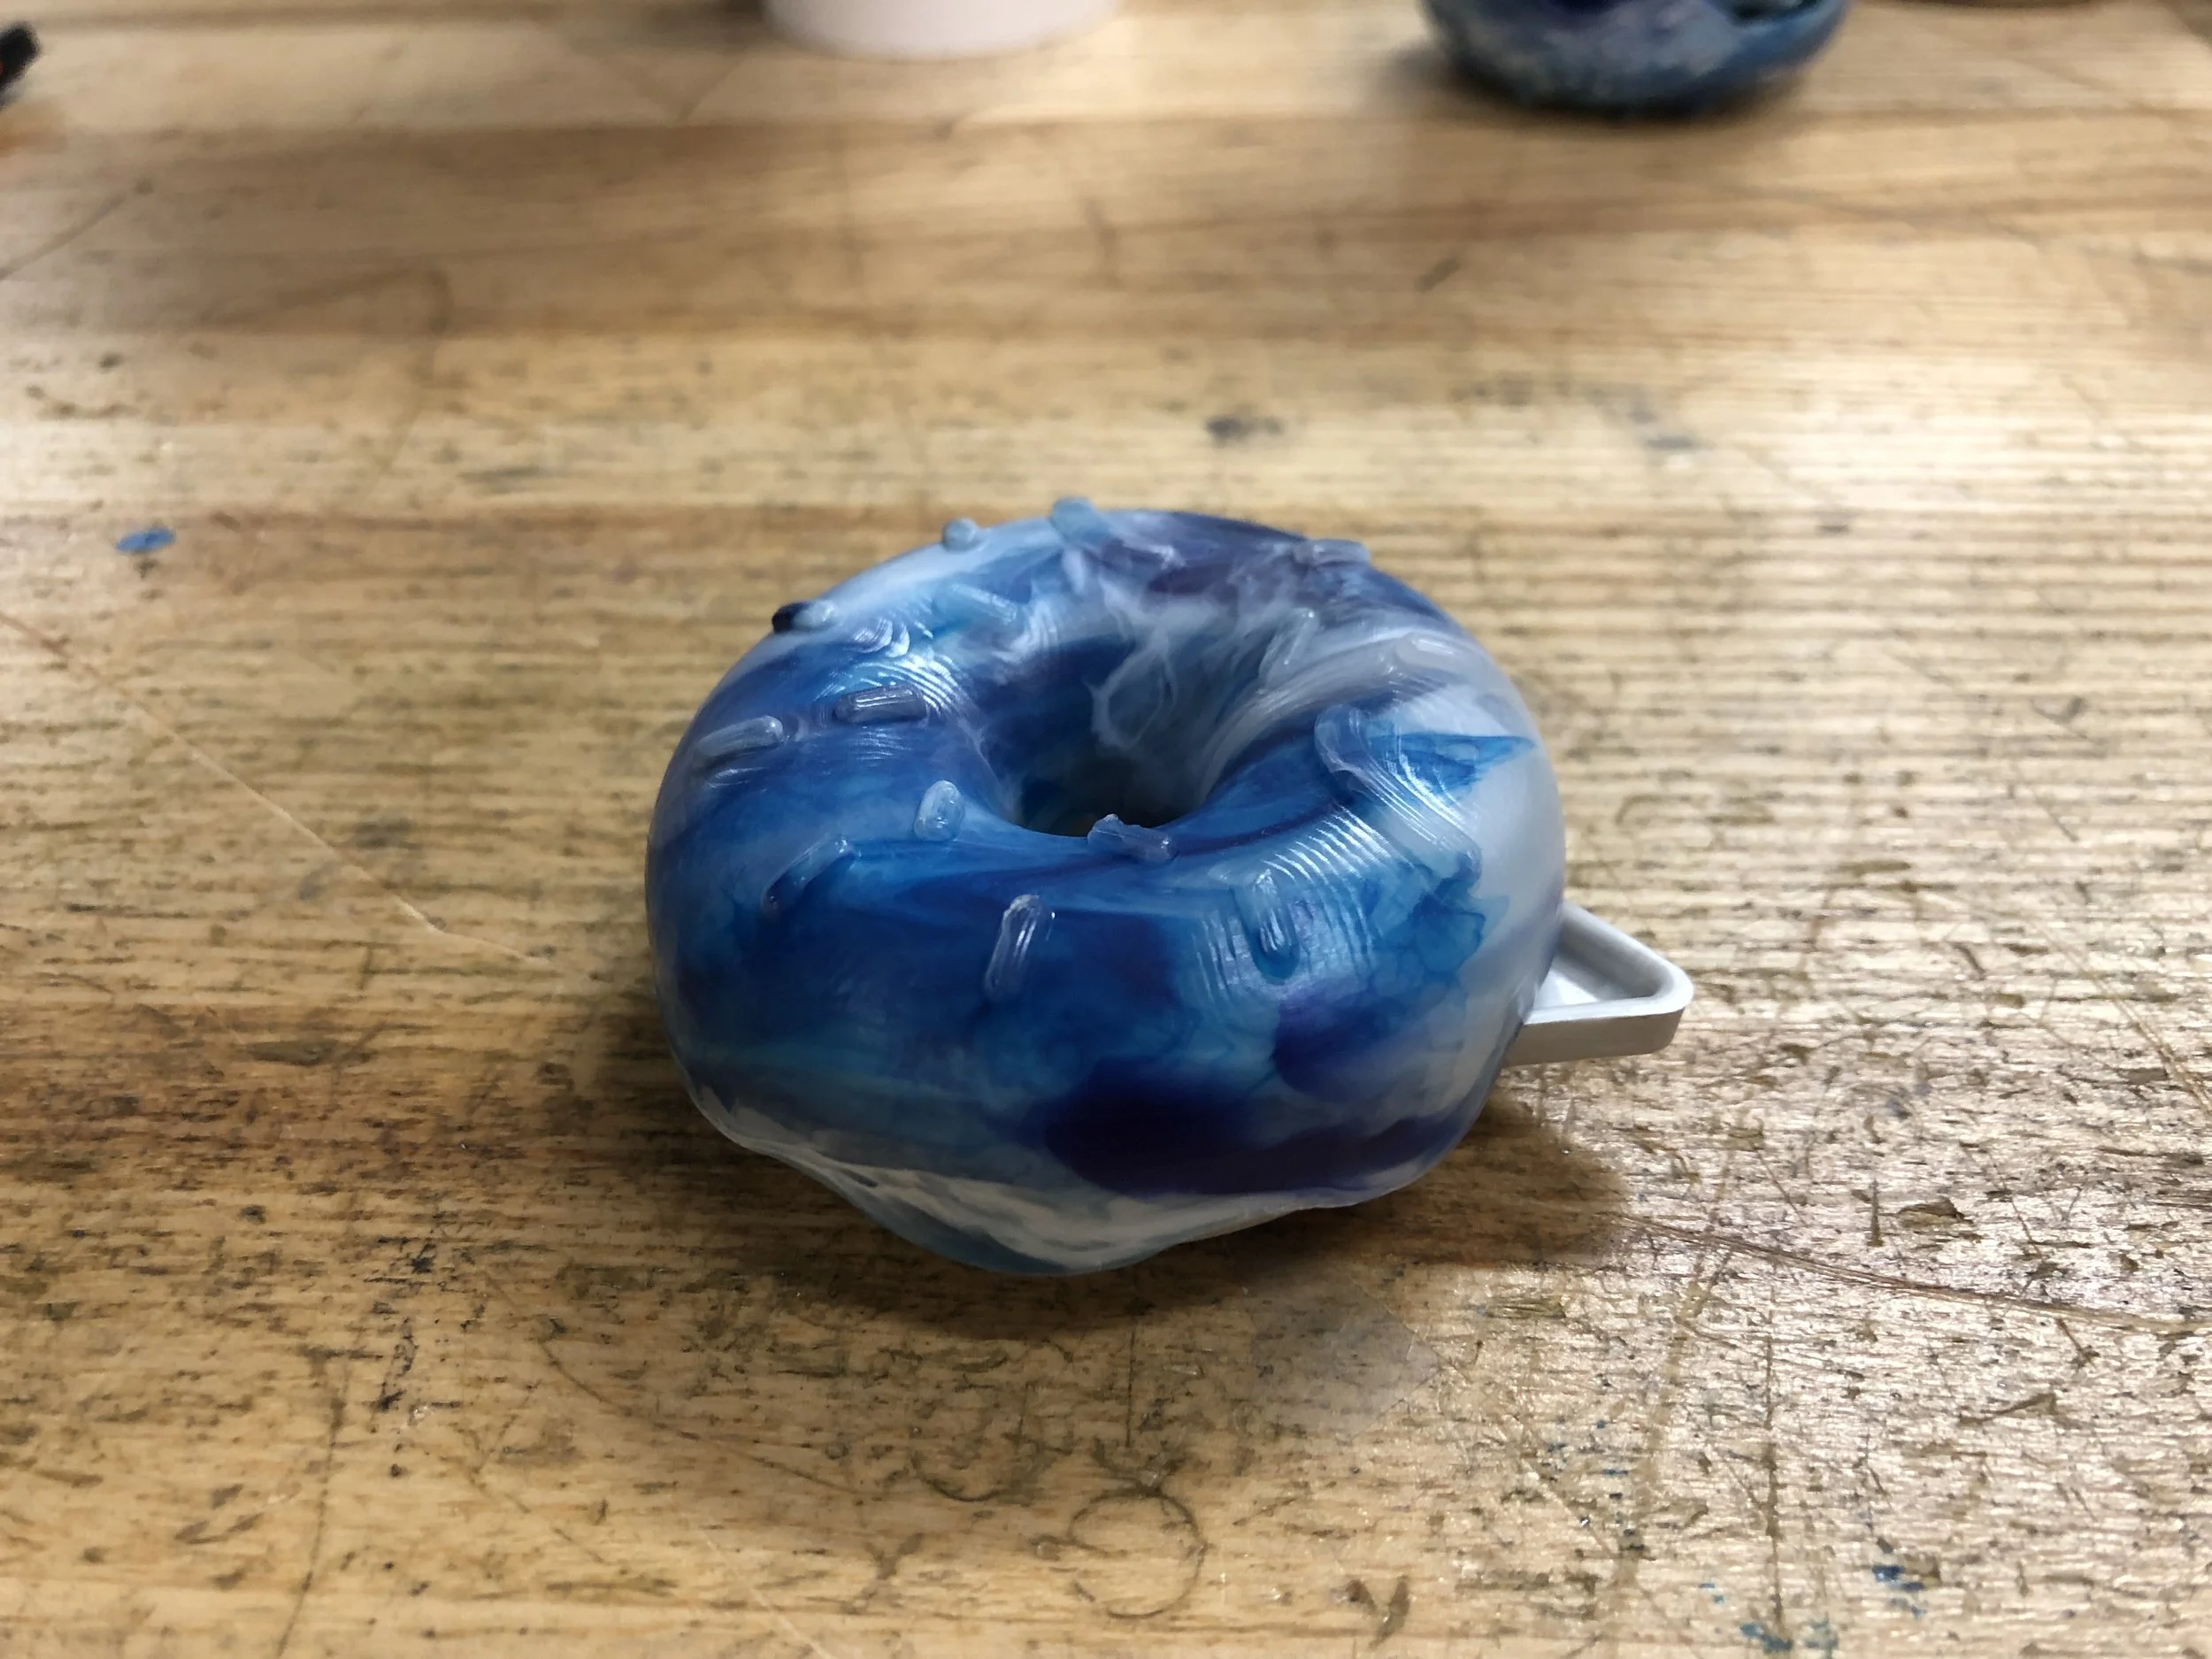
Using injection molding, we fabricated the final Cat Donut using mixed colors to create as close to a rainbow effect as possible.
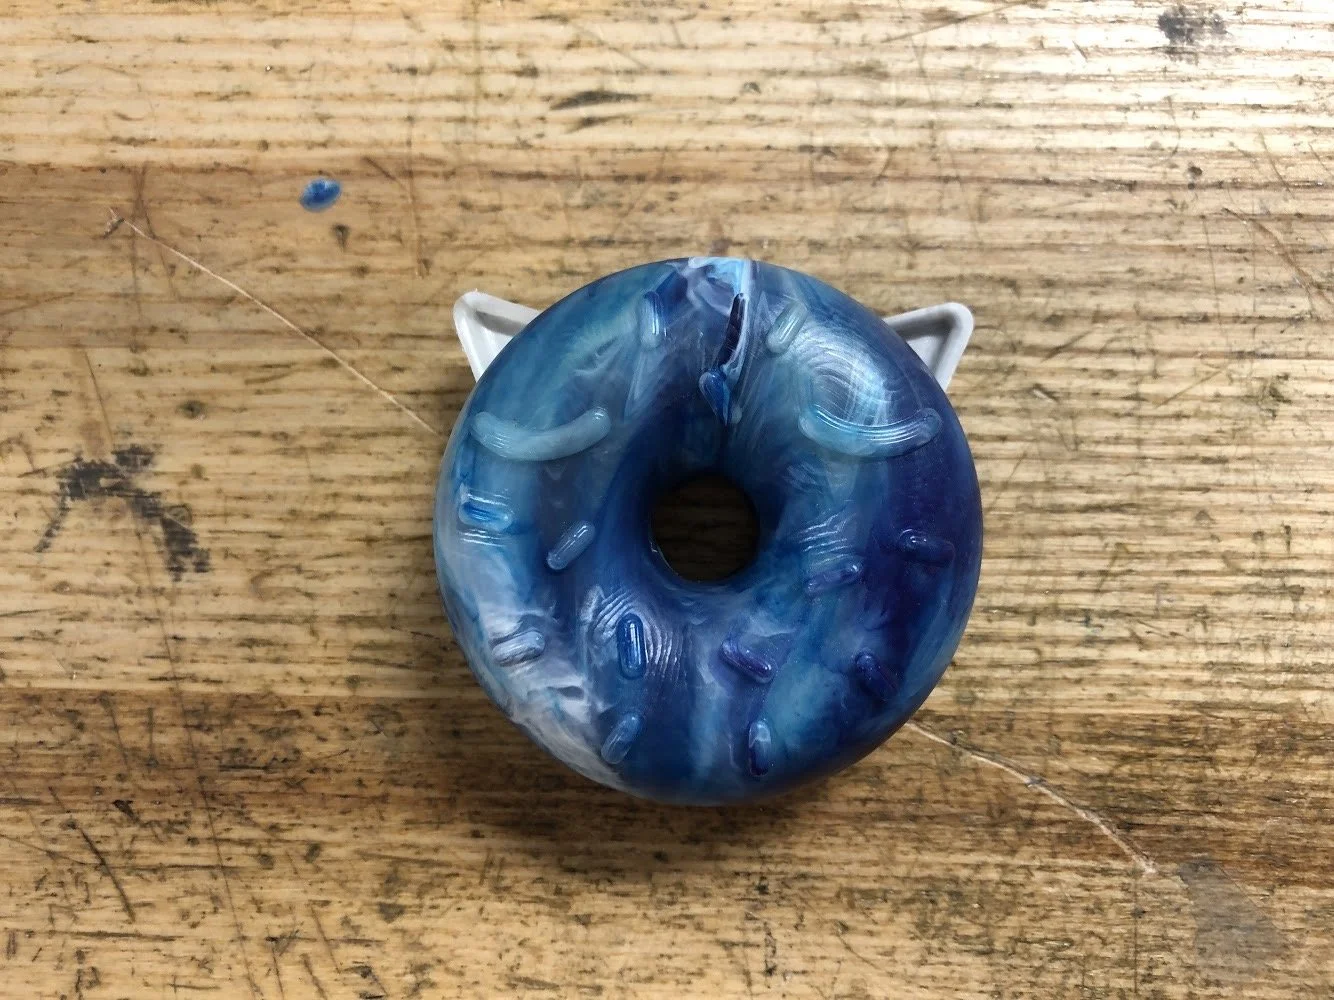
Top View
The Cat Donut
Bottom View
The Cat Donut
Isometric View
The Cat Donut
Side View
The Cat Donut
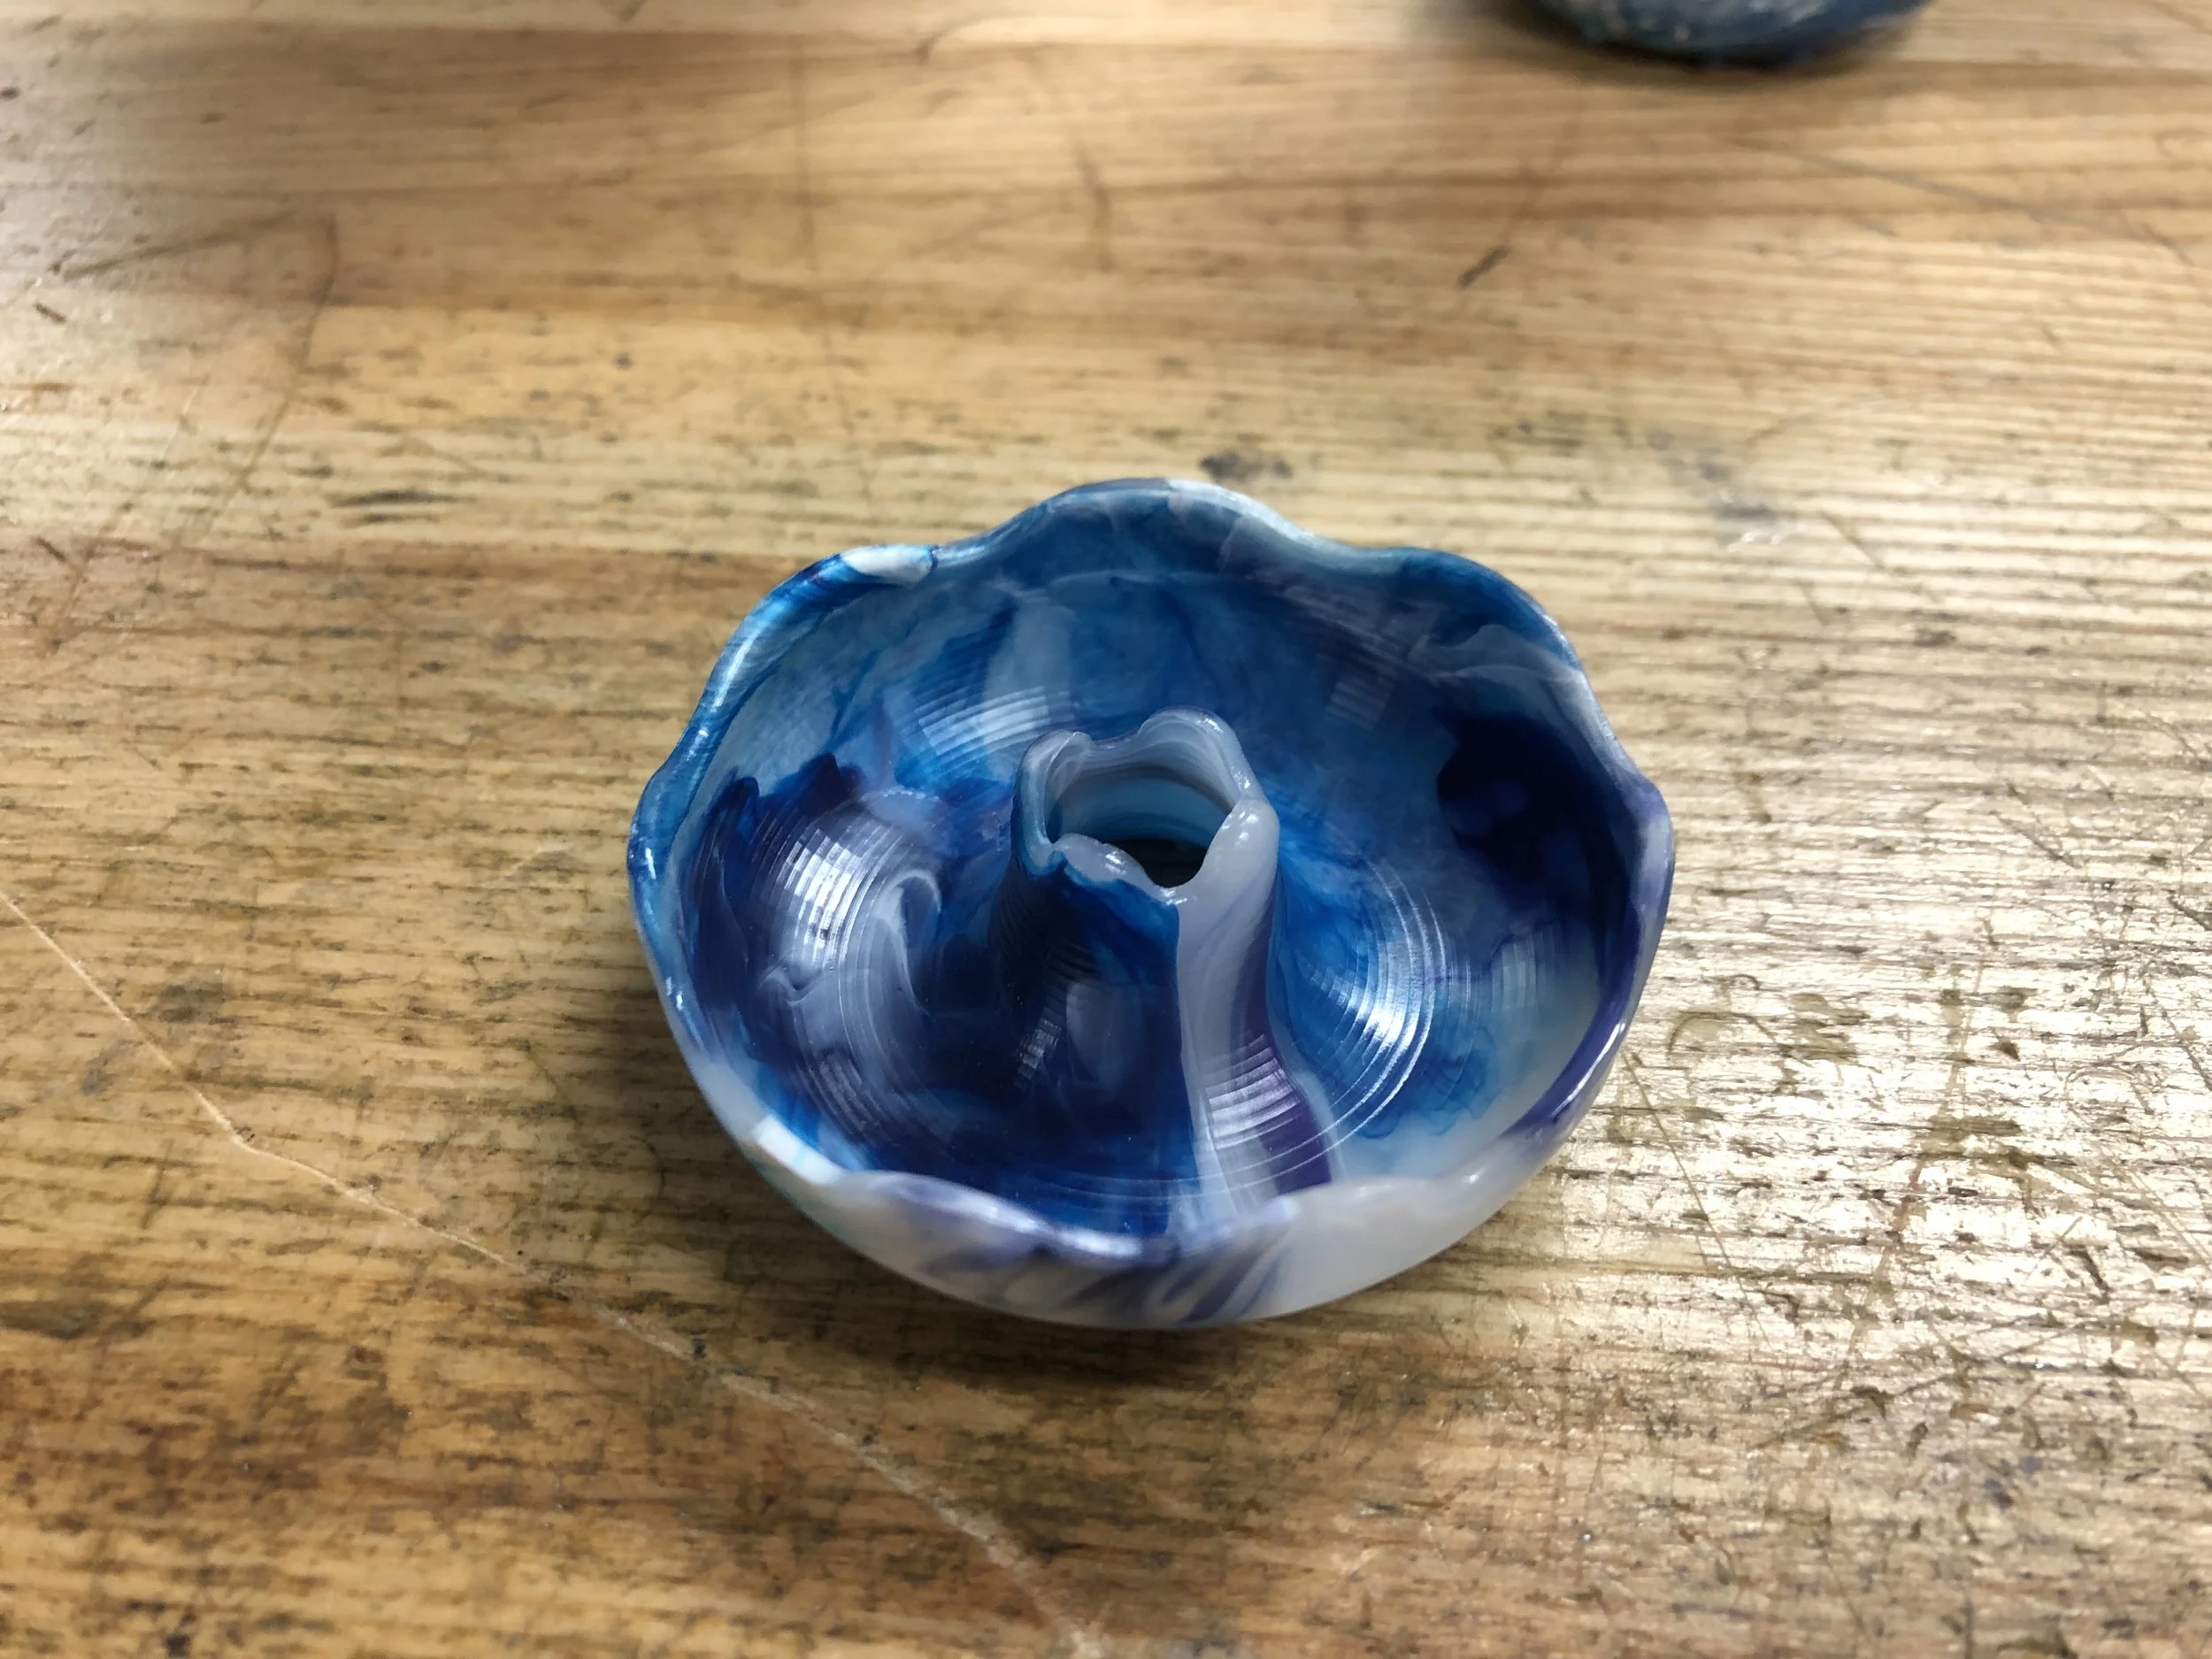
Top Half, Bottom View
The Cat Donut
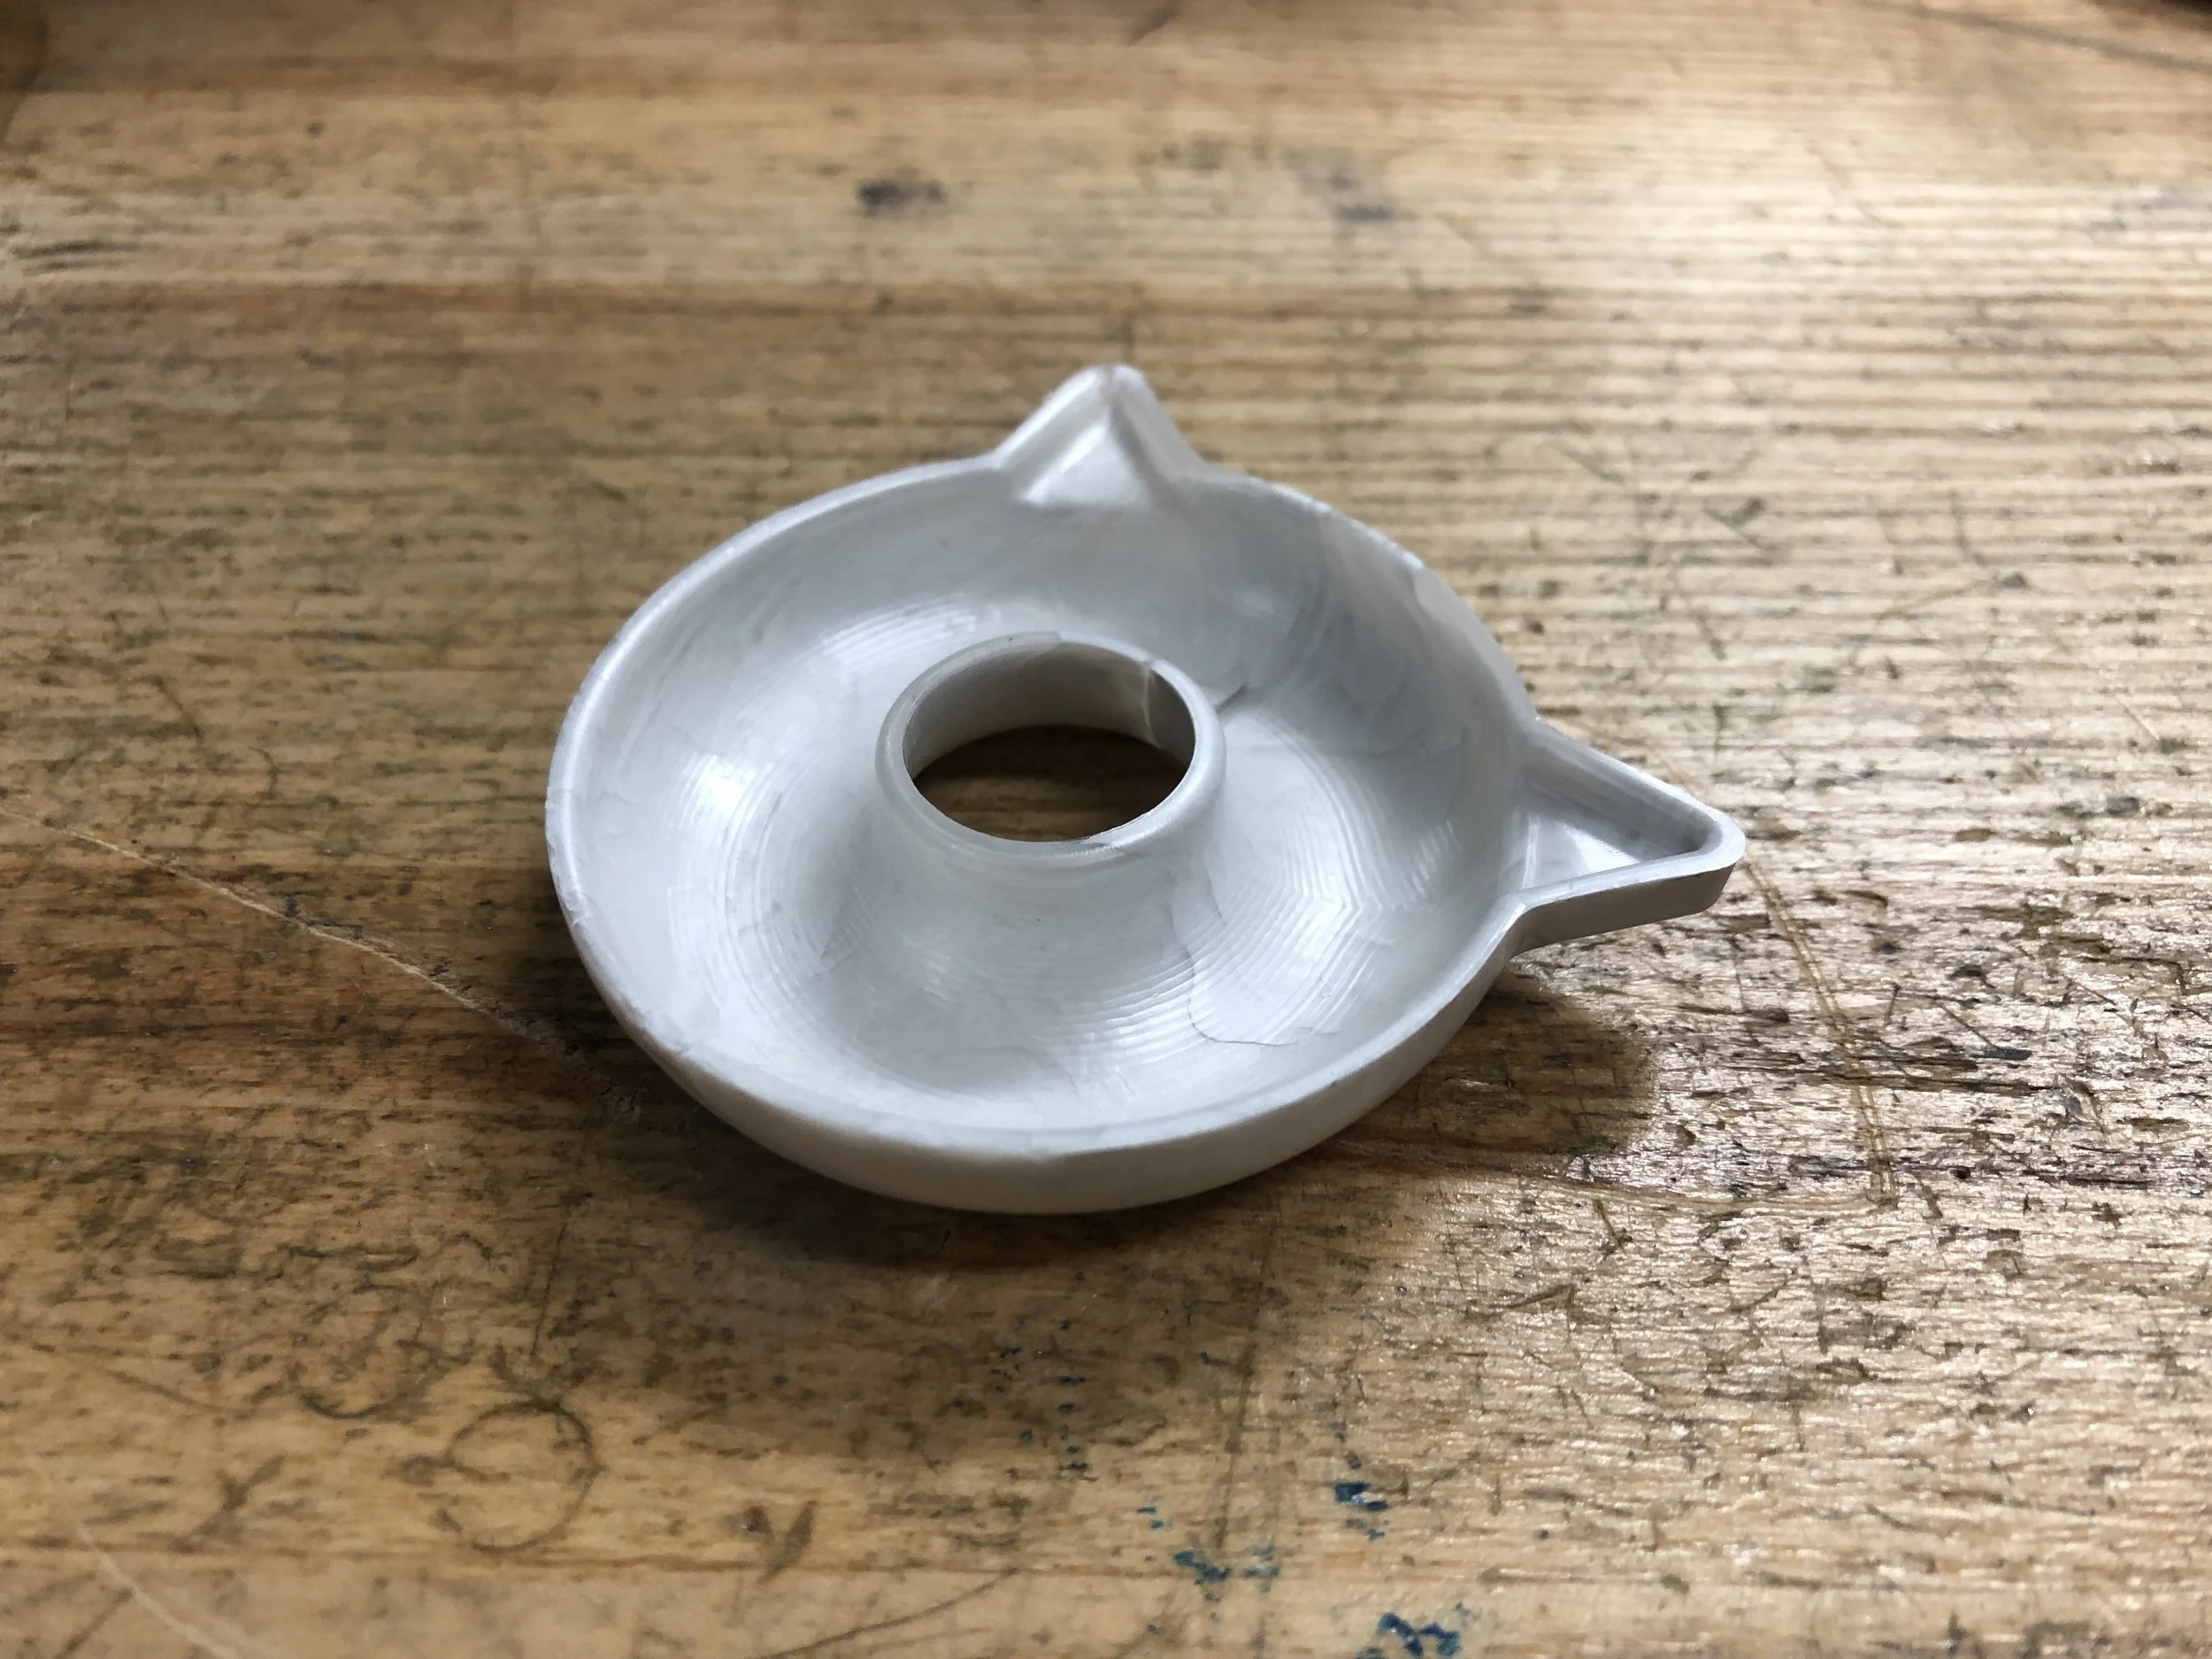
Bottom Half, Top View
The Cat Donut